
Before You Begin
Ensure you have admin access to both Darwinbox and Empuls. Contact Darwinbox support to enable the integration framework if not already available.Why This Integration?
This integration automates user account management in Empuls based on employee data in Darwinbox. It allows you to recognise team members directly and instantly via your existing Darwinbox framework. With this integration, you can :- Add new employees to Empuls automatically as soon as their Darwinbox profile is created.
- Edit existing employee data in Empuls by updating their Darwinbox profile.
- Remove exited employees from Empuls based on their exit date in Darwinbox.
Set up integration
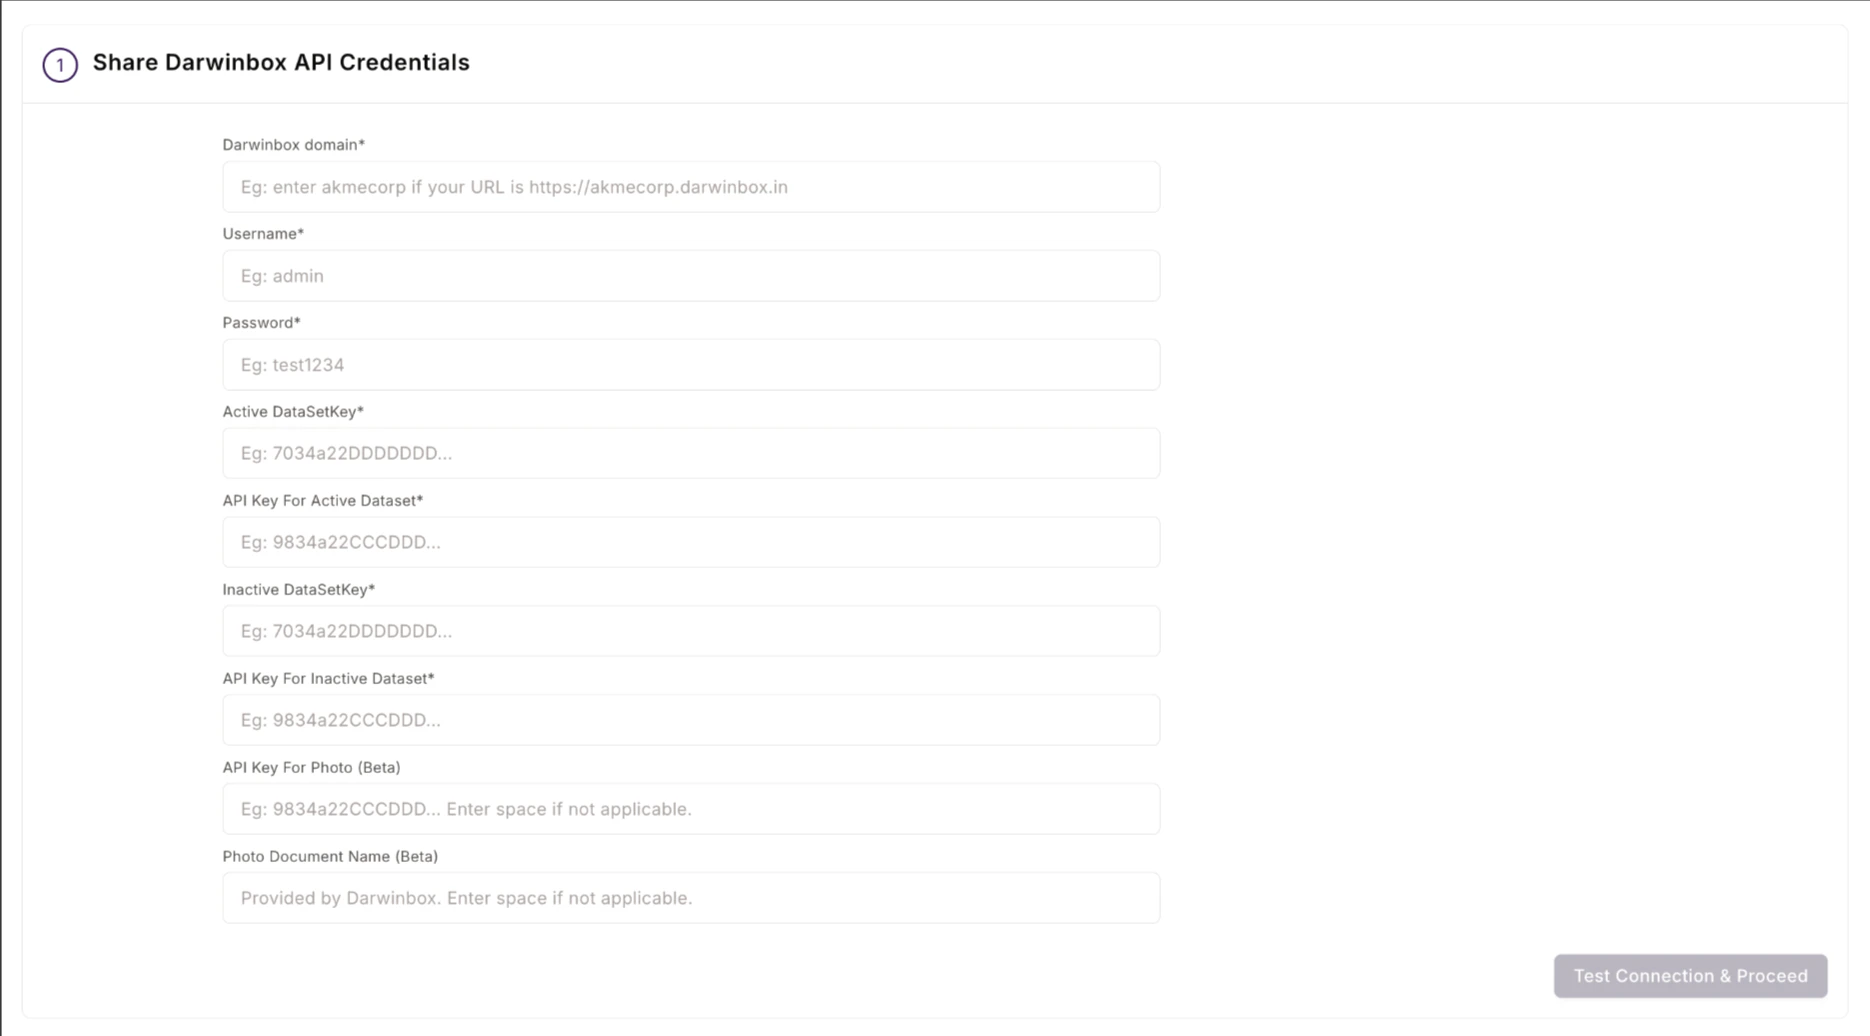
Contact your Darwinbox account manager and ask him to share the client details below concerning your Darwinbox account.Step 1: Provide your Darwinbox credentials
Admin is required to provide the Darwinbox credentials to connect with the Darwinbox APIs and fetch all employee data. Contact your Darwinbox account manager to get the below client details concerning your Darwinbox account:- Domain: HRMS domain name
- Username (Service User Name)
- Secret Key (Service User Password)
- Dataset Key[Active]
- API Key for Dataset [Active]
- Dataset Key[Inactive]
- API Key for Dataset [Inactive]
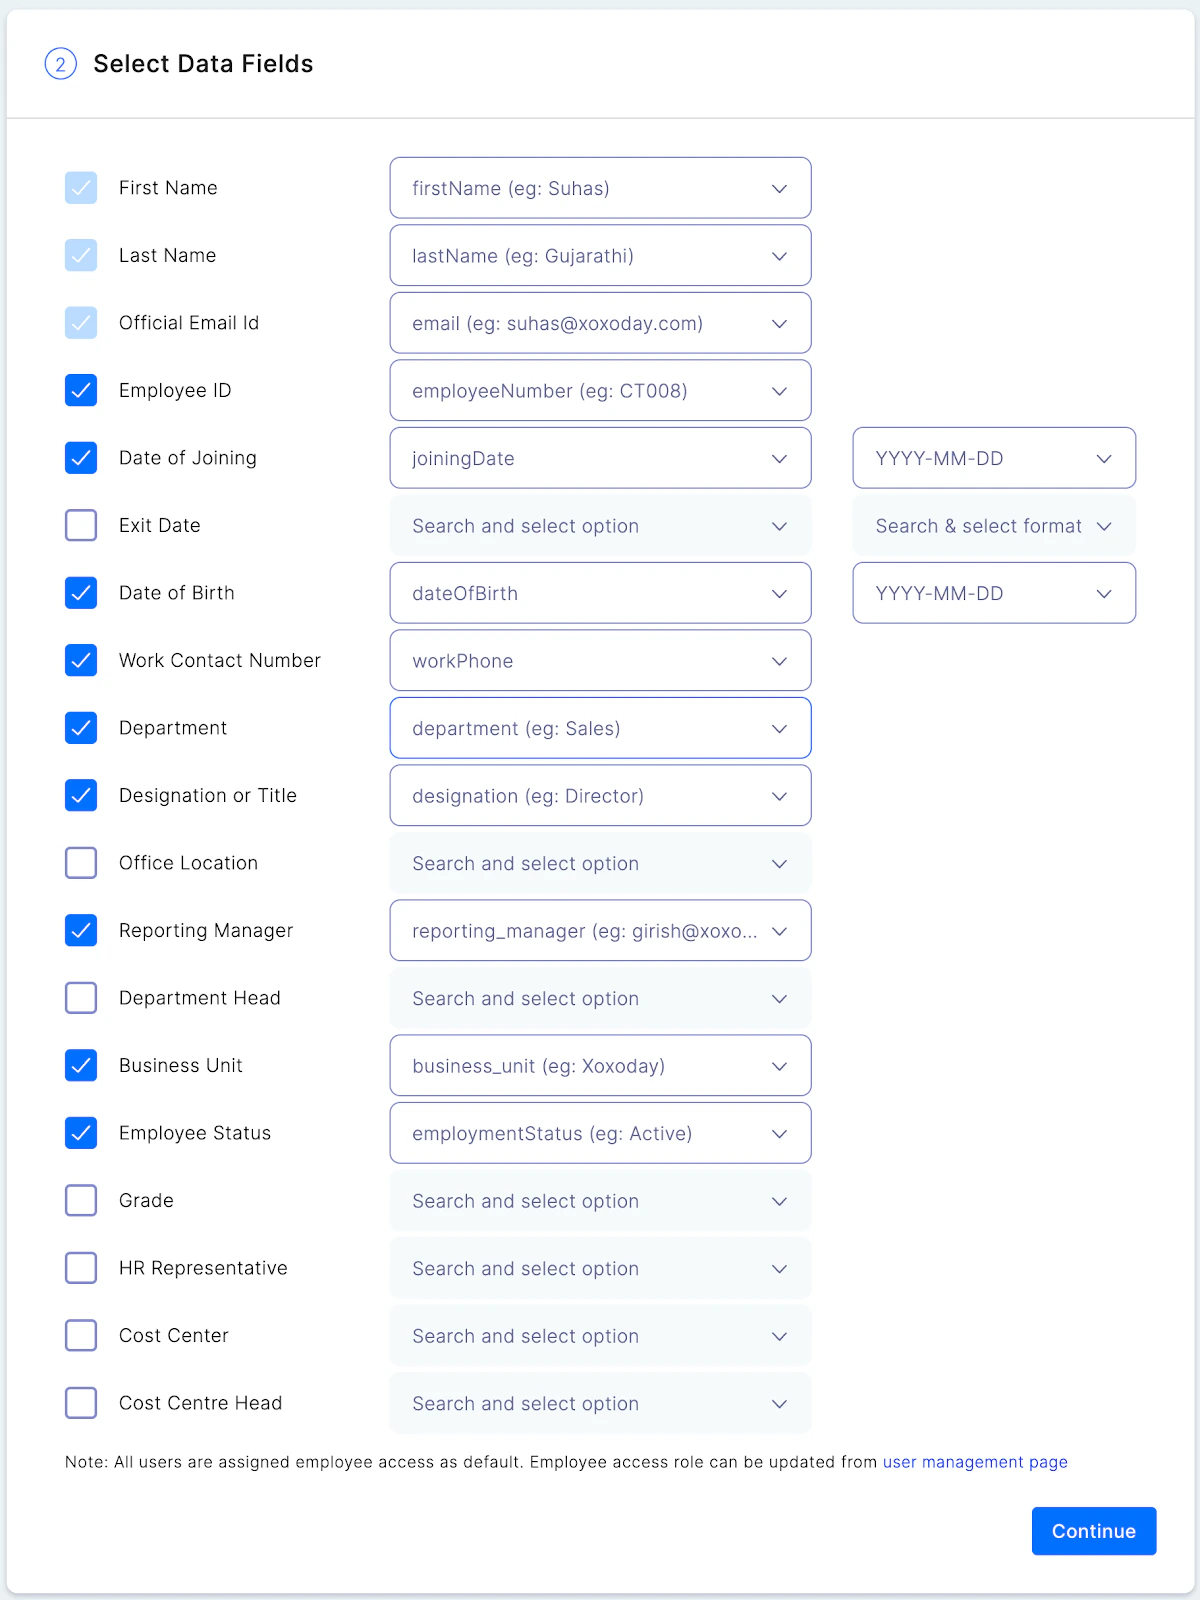
Step 2: Map Data Fields
This step allows you to select and map the data fields to be uploaded to your Empuls account. You can do the following in step 2.- Select the data fields to be imported to Empuls. All the fields are selected by default. You may uncheck the boxes to unselect specific fields. For example, Uncheck the Work Contact Number fields if you do not wish to share this information with Empuls. A few fields, like the First Name, Email ID, and Status, are mandatory and thus cannot be unchecked.
- Map the data fields on your Darwinbox account to the correct fields on Empuls to configure the platform per your needs.
- Select date format for Date of Joining & Date of Birth fields to ensure that dates are updated correctly.
- First name
- Last name
- Official email
- Employee code/ID
- Grade
- Department
- Designation
- Date of birth
- Date of Joining
- Mobile number
- Business Unit
- Cost center
- Location
- Contact/Mobile number and many more
Step 3: Define Filtering Criteria
You may add your filtering criteria to avoid account creation for external consultants and test accounts that you may have created on your Darwinbox account. You can choose to skip this step if irrelevant to your organisation.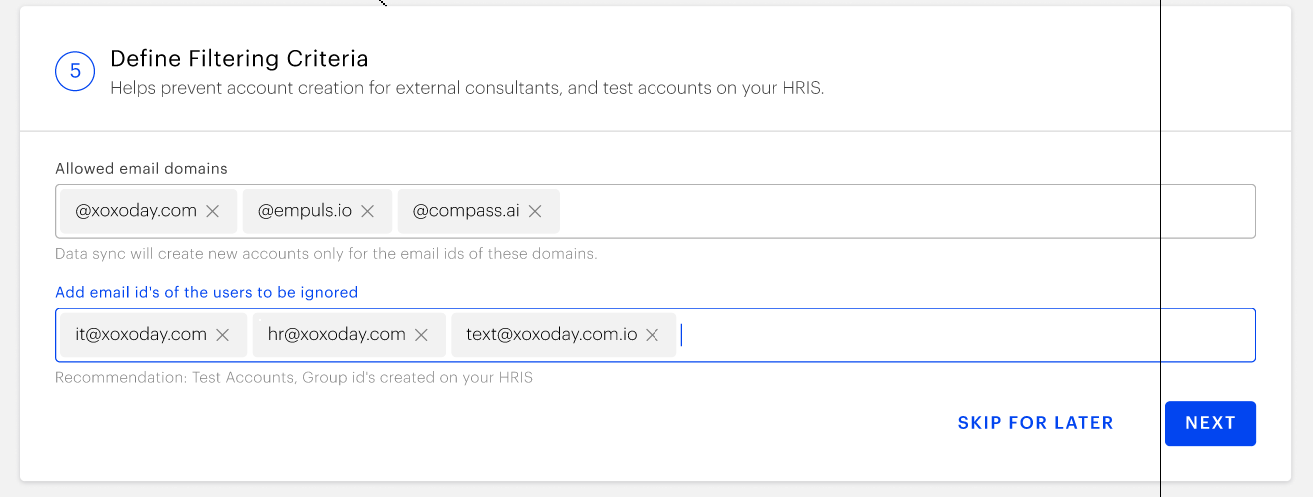
Step 4: Schedule Data Sync
You may choose between two Data Sync options: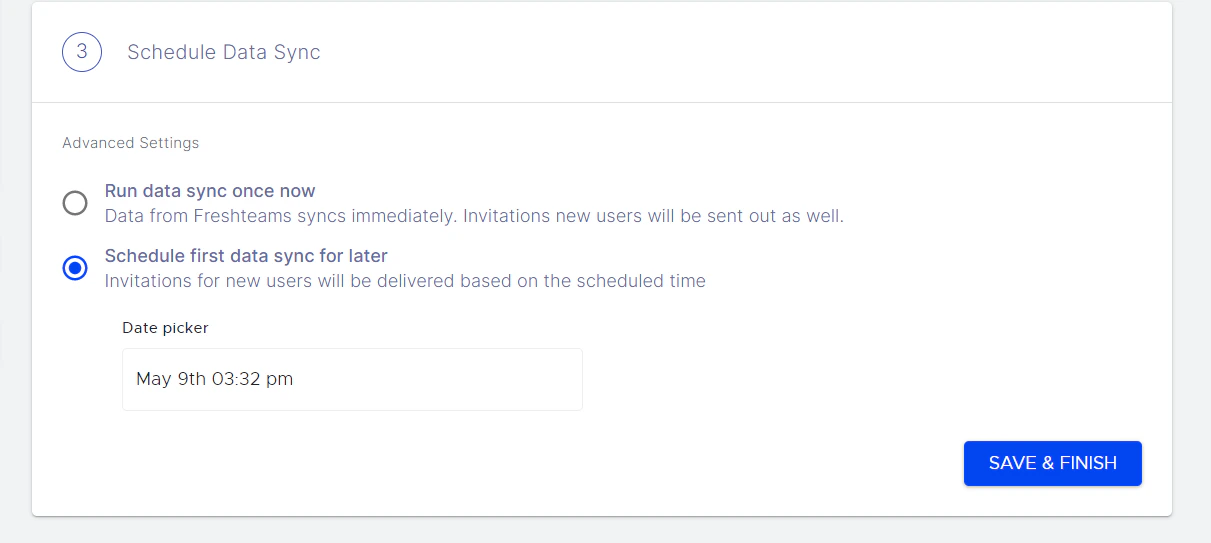
- Option 1: Run Date Sync Once Now: Select this option to launch your Empuls immediately. This will create accounts and send invites for all employees.
- **Option 2: **Schedule First Data Sync for Later: Select this option to schedule employee account creation to a later date and time. This will help you plan and execute employee account creation on Empuls to coincide with your internal launch announcements.
Step 5: Download data to validate
Admins can download employee data in CSV format before uploading to Empuls to validate that the data fields are mapped and no record is repeated. Click on Save & Finish to complete your integration.Next Steps
Verify the integration framework is enabled in your Darwinbox account. Test with a pilot group before full deployment.Questions, feedback or support? Email cs@xoxoday.com